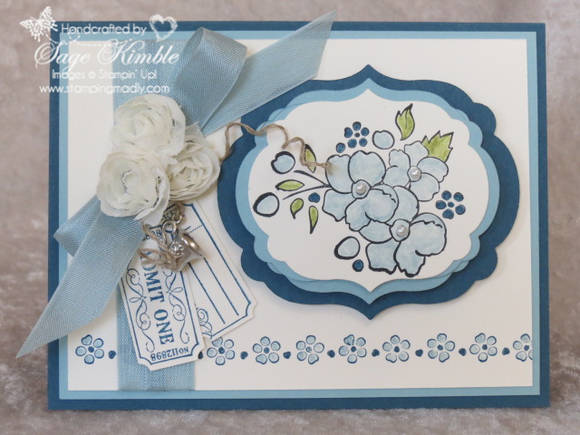
If you think size doesn’t matter, here’s a design tip to help make your cardmaking easier.
If you’re new to cardmaking, you may see cards you’d like to copy, but have no idea what size they are. I’ve also heard from experienced stampers who still get confused about dimensions of cards and layers.
So here are the basics:
- The most common size for handmade cards is 4 1/4″ x 5 1/2″. This fits in an A2 envelope, like Stampin’ Up!’s Medium Envelopes. One of the advantages to this size is that you can make the card base from half a sheet of 8 1/2″ x 11″ card stock, which is an economical use of your supplies. Once you fold that piece in half, you’ll get the 4 1/4″ x 5 1/2″ card front.
- A lot of times cardmakers will add a layer on top of the card front, and it is usually 1/4″ smaller than the base. So that will measure 4″ x 5 1/4″. This simple card I showed earlier this week uses this measurement.
- If you want a layer on top of that, it’s most common to cut it 1/4″ smaller again. That would measure 3-3/4″ x 5″. This card is a good example. By the way, it’s the card featured in the last newsletter, that subscribers received instructions to make.
- Here’s a card that has the first layer on top of the card front 1/4″ smaller, and the next layer is 3/16″ smaller than that. It measures 3-3/16″ x 5-1/16″. It’s subtle in this card, but gives a little different effect. You can see it more dramatically in the card in this post: Why Use 3/16″ mats.
The layers form mats for whatever is on top of them. When you cut a layer 1/4″ smaller than the one underneath it, the mat is actually 1/8″ on each side: Half of the 1/4″ (or 1/8″) is on one side, the other half is on the other side. When you cut a 3/16″ mat, the mat is actually 3/32” on each side. But don’t worry, you won’t EVER have to measure and cut 32nds!
Have I lost you yet? I know some people’s eyes roll back in their heads when they try to figure out fractions. Don’t let fractions fool you, they’re easier than you think, especially when you look at a ruler. Fortunately, as paper crafters, we really only have to understand a few of them.
Speaking of which, a really essential skill for any paper crafter is reading fractions on a ruler or paper cutter. Here’s a video I made on reading 16ths of an inch, but you’ll also see how to read other fractions as well.
Use this button to download the drawings mentioned in the video:
The bottom line is this:
- Start with a standard card size for your project, then cut layers either 1/4″ or 3/16″ smaller in each dimension (width and length).
- The mats for your focal point are then cut 1/4″ or 3/16″ larger than the top layer.
When designing or making handmade cards, size DOES matter, and knowing the common measurements makes cardmaking easier!


